CAFFENOL
INTRODUCTION
Caffenol is a darkroom toy, built on film development and darkroom craft. You load a photo and develop it into a negative in a simulated tank. Then you print that negative under a timed enlarger exposure. You shape the light by hand with cut cards that you wave over the paper.
The process is slow, and every step can make a new result. The pleasure is in the work, and the export is worth keeping, even when the first try is wrong.
There is no correct way to use Caffenol. Bend the system, and break it, until it works for you.
THREE STAGE WORKFLOW
Photos run through three stages: the bench, the tank, and the enlarger.
STAGE 1: THE BENCH
The bench is a light table. Use it to import photos, or to examine negatives that you developed before.
The house roll
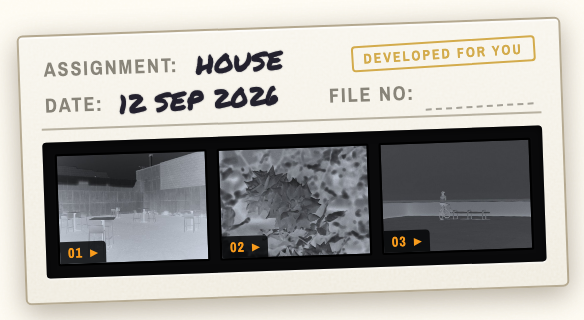
A fresh bench is not empty. A contact sheet of three frames lies on the glass, stamped DEVELOPED FOR YOU: the house roll, the three starter scenes already run through the tank so the first click can go straight to the enlarger.
The three frames were developed three ways on purpose, and the rebate edge of each reads its recipe:
- Frame 01, the patio, developed by the book: VELVETOL at stock, tempered, agitated for the first half minute and briefly at the top of each minute.
- Frame 02, the roses, left to sit: ACUTOL-S cut 1+1, swirled at the pour and never again. Exhausted developer pools and drags, so the edges etch and streaks run.
- Frame 03, the seawall, pulled at a third of the chart: thin, flat, and murky. A high grade under the enlarger is the rescue.
Click a frame to print it. The first click on a frame fetches its source and regenerates the negative from its recipe and seed (a few seconds, and the bench says so), then it goes under the lamp like any negative. Drop the whole sheet in the tank to develop all three again your own way.
The sheet is furniture until you touch it: nothing is saved until a frame is taken, the sheet is moved, or a line is written on it. The scissors on any frame bin the whole house roll while any frame is still untouched, with UNDO for a moment; a binned house roll stays binned. Once every frame has been touched it is a roll like any other, and the scissors cut one frame at a time.
The house roll leaves the drawer open beside it. It appears only on a bench with no negatives of your own, and stays once touched.
Loading a photo
Three ways to load:
- YOUR PHOTOS: the loading key on the bezel, beside the drawer face. Click the key to pick a file, or drag a photo from your desktop onto any part of the bench.
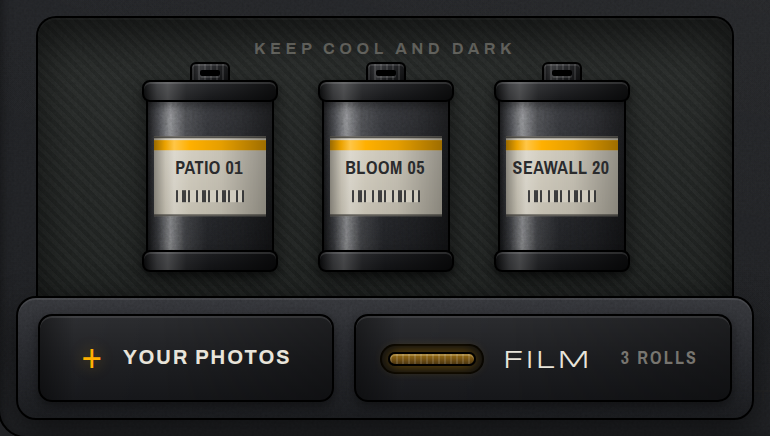
- Starter rolls: sealed cassettes in the film drawer (PATIO 01, BLOOM 05, SEAWALL 20). Click a cassette to load and develop it, or drag it to the tank dock.
- Straight into the tank: drag any cassette onto the tank dock; the develop stage starts.
Accepted formats: JPEG, PNG, TIFF, and camera raw (DNG, CR2, CR3, NEF, ARW, RAF, ORF, RW2). A raw file loads from its embedded preview. HEIC is not supported; a raw file with no embedded preview cannot be read. Export a JPEG first for either case.
You won't see what's on the negative until it's developed.
Scanned negatives
Caffenol does a quiet test on every upload. If the file looks like a developed negative scan, Caffenol skips the tank and lands it on the glass, ready for the enlarger. If the test is unsure, the photo takes the usual path.
ALREADY A NEGATIVE in the tank sends the scan straight under the lamp when you know it came through as a scene. Works for uploads only, and only before you pour.
The negative shelf
The shelf shows your negatives.
- Drag a frame to reposition it; Caffenol remembers the position.
- Click a frame, or drop it on the enlarger, to print it.
- The loupe: an 8x glass that rests on the light table. Slide it over any frame to read the emulsion close up. It stays where you leave it.
- Click the paper of a contact sheet to lift the whole sheet to the light. The paper is the stationery margin, the header, or the black channel between frames. Its frames fill the glass and the rest of the bench falls back. Everything still works while the sheet is up. Cut a frame, click to develop or print it, or drag the sheet where you like. Click it again, press Escape, or touch anything else on the bench to lay the sheet down. The loupe reads a lifted sheet the same way it reads a resting one.
- Click a line on a contact sheet's header to write on it in marker. ASSIGNMENT is the roll's name: write over it and press Enter, or Escape to keep the old name. Every frame on the roll, and every print made from one, takes the new name (PATIO 01 ON PRESS 400 becomes BEACH 01 ON PRESS 400). DATE reads the day the roll was loaded until you write over it, and FILE NO is a blank rule for whatever you file the roll under. A blank entry restores a line's default.
- The rebate edge carries the recipe in short form: developer, dilution, temperature, and time. Appears on hover, as you choose which negative to enlarge.
- The hover ✕ bins a negative; undo is available for six seconds, then the negative is gone.
The shelf survives a reload; negatives and print sessions persist in the browser's IndexedDB. Caffenol holds only one working negative in full; the rest of the shelf keeps a small preview until you put it on the bench.
STAGE 2: THE TANK
You build a recipe, pour, agitate (or not), and pull the film when you like. Development runs live, and you can cancel it at any instant.
FILM: the stock
The roll that you shot on. Each stock has its own characteristic curve (contrast, toe, shoulder) and grain. Grain comes from the film; the developer only shapes it, so every film and developer pair gives a distinct texture. Step through the shelf with the prev and next keys, or swipe the window.
Black and white stocks, always available:
| STOCK | TRAIT | CHARACTER |
|---|---|---|
| HALO 250 | SOFT CINE GRAYS | Cinema stock. Long sweeping toe, gentle shoulder, silvery grays that never quite reach black. Rounded, handsome grain. |
| PRESS 400 | FORGIVING WORKHORSE | The reportage all-rounder. Soft shoulder holds highlights forever, takes a push with grace. |
| FLEX 125 | SLOW, FINE GRAIN | Slow and fine, a touch more spine through the mids. Classic landscape and portrait polish. |
| MONO-X 400 | GRITTY STREET | Crunchy toe drops shadows fast, gritty assertive grain that loves an edge developer. |
| EURO 100 | FOGGY, SOFT COAT | Old-world budget charm. Extra base fog, coarse lovable grain, a soft coat that mottles in the pour and crazes under a shock. |
| MAXI 100 | SHARP, CLIPS HOT | Modern tabular grain, near grainless and razor sharp, but the hard shoulder clips. Sings only when exposed generously and developed short. |
| ORTHO 80 | BLIND TO RED | Blind to red, generous to blue. Lips, brick, and rust go black, skies go empty. Fine even grain. |
The color and slide stocks are a separate lab (see COLOR AND SLIDE below): MEADOW 160, CARNIVAL 400, VISTA 100, and the LANTERN 100 slide.
ORTHO 80 and the color stocks require color channels in the negative.
CHEMISTRY: the developer
Three bottles on a rack. Step through them with the keys beside the window; the wedge under each name is the negative that bottle leaves, from bare base to the deepest density, as it will look on the light table.
- VELVETOL (SOLVENT SMOOTH, FINE GRAIN): a solvent developer, and the default in a fresh tank. Spreads development evenly; rounds the grain soft and creamy.
- ACUTOL-S (ETCHES EDGES, GRAIN STANDS): a lean acutance developer. Local exhaustion etches crisp edges and Mackie lines, and the grain stands. It works slowly.
- CAFFENOL-C (COFFEE BREW, WARM STAIN): the house brew of instant coffee, vitamin C, and washing soda. Slow and low in contrast, with loud grain, and it stains the whole negative the color of weak coffee. The stain shows on the light table and warms the beam under the enlarger, and it fogs the base a little, so the print wants more light. The paper sees only density: the print itself is plain silver.
Dilution alters the mix. A cut mix works more slowly: stronger edge effects, sharper grain, tamed highlight contrast.
- STOCK: full strength, the baseline.
- 1+1: slower, edgier.
- 1+2: lean and slow, the edgiest of the three.
Stop bath and wash are toggles; the panel states the cost of skipping either before you commit.
- No stop: the developer keeps working; you get streaks.
- No wash: bubble spots on the negative.
- Neither: streaks and bubble spots together.
BATH: temperature
A hotter developer works faster and coarser; colder works slower and thinner. The chemistry follows a time and temperature law. The CHART readout updates as you move the dial, estimating how long this recipe needs to reach full development.
The TEMPER mark is the process base.
A temperature too far from the base shocks the emulsion. A cold bath on a warm coat crazes it into a vein network (reticulation). The interface lets you know when you're in the danger zone.
- SHOCK RISK: TEMPER YOUR BATHS at the edge of the danger zone.
- SHOCK: EMULSION WILL CRAZE deeper in.
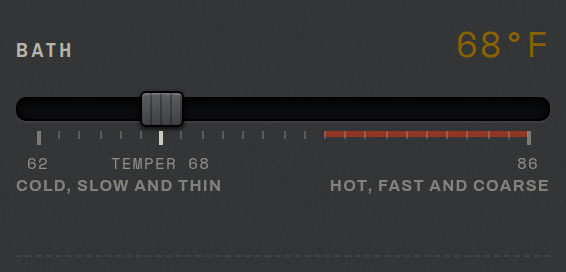
EURO 100 emulates a softer coat, and will show reticulation.
The temperature scale follows the process of the loaded stock (B&W, C41, E6). Black and white sits around room temperature (base 68 F, range 62 to 86). Color processes run hot and narrow around their own base.
CLOCK: time-lapse
TIME-LAPSE ×8 runs the soak at eight times speed. Toggling during development does not change the result.
Developing
POUR AND START begins development. The negative reveals itself under the safelight as it develops. Two controls shape the result:
- Agitation evens the development. Hold HOLD TO AGITATE on the tank, or shake a device that offers motion. A still tank lets exhausted developer pool and drift; the result is streaks and adjacency halos (Mackie lines).
- Time on the curve is set by the moment you pull. PULL AND FIX stops development. Pull early; the negative is thin, flat, and murky (underdeveloped). Let it run long; the negative climbs into dense, harsh contrast (overdeveloped). Pull when the negative looks the way you want it; there is no fixed time.
Every negative inherits a faint pour mottle. A seeded minority also shows drying marks.
Processes
The stock decides the process.
- B&W: a silver negative and the default process.
- C-41: a color negative. The tank builds three dye layers and the orange integral mask.
- E-6 reversal: a slide. The tank builds the silver negative; the fix runs the reversal and returns a positive. A finished slide goes to the light table; the enlarger is still reachable for printing.
When the negative is developed, TO ENLARGER takes a negative to print and TO LIGHT TABLE takes a slide to the bench. DEVELOP AGAIN resets the recipe.
STAGE 3: THE ENLARGER
You project the negative onto paper under a timed exposure and shape the light by hand. Light accumulates on the paper in every frame. A dodge card withholds it; that area prints lighter. The hole in a burn card adds it; that area prints darker. At stop, the paper curve maps the accumulated exposure into a positive.
PAPER: the stock
The box that the sheet comes from. Sets the material, base tone, maximum black, surface sheen, and tooth.
| BOX | TRAIT | CHARACTER |
|---|---|---|
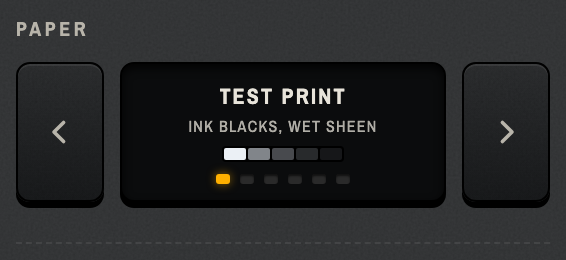
| Test Print | INK BLACKS, WET SHEEN | The modern trade sheet. Coldest, deepest, near textureless. A print taken at its word. |
| Christmas Gift | MATTE, VELVET GRAYS | Velvet diffuse. No glare, no favorites, blacks that stop short and do not apologize. |
| Gallery | WARM BASE, TOOTHY | The gallery classic. Warm bone base, brown-black depths, an air-dried fiber tooth you can feel with your eyes. |
| Book | COLD TONE, STEEL BLACKS | Old bromide manners. Steel-blue blacks on a cool base, matte-leaning fiber with a fine visible grain. |
Two more boxes live in the color lab (see below): the Postcard RA-4 color sheet and the Slide Print direct positive sheet.
Each box carries a small step wedge in its own tint, paper white to its black. Under the safelight the easel shows a dim estimate of the sheet at the dialed seconds, so a step of the box, the grade, or the clock shows on the easel before any paper is spent. Once the exposure starts, the estimate follows the light you are actually laying down.
GRADE: contrast
The grade is a contrast number on the multigrade ladder, from 0 (soft) to 5 (hard). Low grades open the tonal range and hold detail everywhere. High grades crush the image toward pure black and white. A thin, underdeveloped negative needs a higher grade; a dense, overcooked one should go lower.
EASEL: turn, rotation, slide, and blades
The rotation slider sets the sheet angle, plus or minus 45 degrees, with a click at zero. Use it to correct a horizon or to lean the image deliberately.
TURN below the baseboard stands the sheet up a quarter turn, so a portrait frame prints upright instead of on its side. The paper takes the turned shape: a landscape negative turned once prints edge to edge on a portrait sheet. Four presses come back around, so an upside-down frame can be righted too. The readout shows the turn next to the angle. Turning clears any cards on the easel, since a card cut for one shape of sheet is no use on the other, and it goes dead once the exposure starts. NEW SHEET unlocks it again.
The baseboard shows the easel from above. The dashed rectangle is the projection area and never moves. The pale rectangle is your paper. Push the paper up to half a frame in any direction; release near center to snap it back to square. The slide is not a crop: the image appears elsewhere on the paper. Paper outside the projection area gets no light and comes out bare white.
Turn on the lamp to preview the paper. Sliding or rotating during an exposure smears the print.
Four blades come in from the edges and crop the print. Every sheet starts with a thin rim because the blades rest on the paper to hold it flat.
Drag the blades on the sheet. Each blade covers up to a third of the frame. Dodge and burn cards over a blade remain movable. The baseboard updates in real time.
RESET beside TURN returns the easel to its default: square, centered, blades open. Active only after something moves. It leaves the turn alone: the turn is the composition, not a drift.
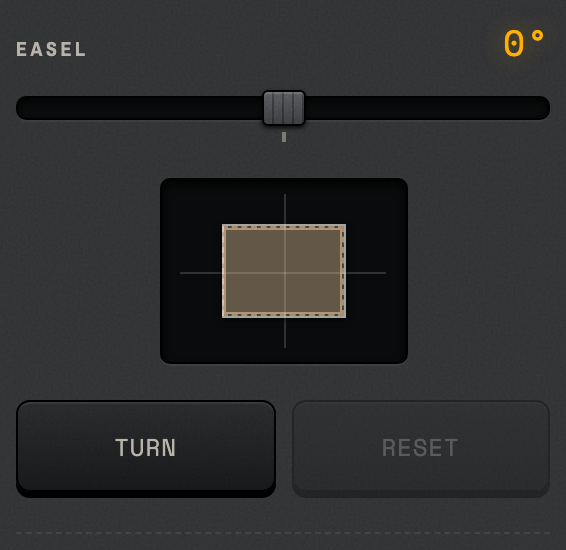
Turn the lamp on to position the blades against the projected image. Blades lock when the exposure starts. Rotation and slide never lock.
EXPOSURE: the window
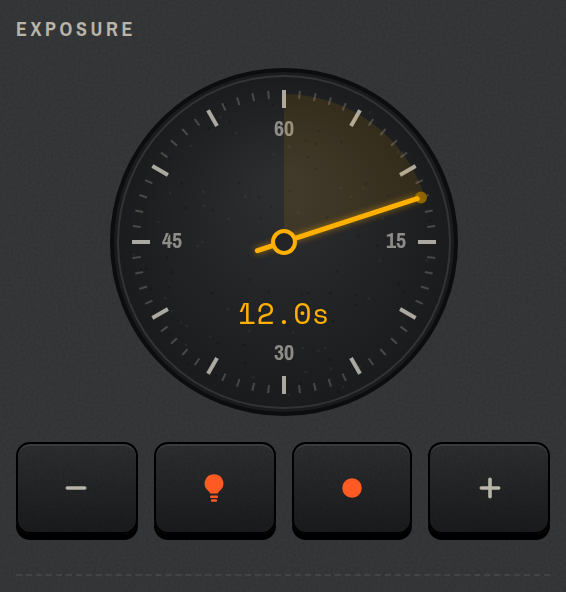
The focometer key row controls the exposure: time down, lamp, expose or stop, and time up.
- Time sets the exposure length, from half a second to 60 seconds, in half-second steps. Fast packs and thin negatives print in a few seconds.
- Lamp toggles a dim ghost preview of where the print is heading. Low opacity and some noise give you enough to steer your hands without killing the reveal.
- Expose opens the shutter; Stop ends the window early and develops what you have. The other keys lock during the exposure.
Dodge and burn by hand
During the exposure window, wave physical cut cards over the paper.
- Cut a card: press ✂ DODGE or ✂ BURN to start a cut. Click or tap corners to draw a closed polygon over the paper. A card needs at least three corners. CLOSE CUT, Enter, or the first corner again lands the card. SCRAP IT or Escape abandons it.
- A DODGE card withholds light where you hold it; that area prints lighter. A DODGE card leaks a little light.
- A BURN card is the inverse: a hole adds light through it; that area prints darker.
- Wave it: pick the card up and move it while the timer runs. Edge softness is bound to pointer speed. Hold still for a hard edge; wave for a feathered falloff. Faster hands feather wider. Touch input gets its own smoothing; a resting fingertip does not flutter the edge.
Caffenol records the whole path of every card: time, position, and speed. A print session is reproducible. CLEAR CARDS removes them all.
On a phone the cards live in the console drawer. The CLOSE CUT and SCRAP IT keys dock on the stage, where the corners land.
After the print
The preview shows the print with its metadata: the negative and the exposure time.
- NEW SHEET prints the same negative again with fresh hands. Keep the negative, change the dodge and burn, and chase the keeper across sheets.
- EXPORT (or SHARE on a handheld) delivers the finished positive as a PNG with its rough deckled paper edge.
SCRAP IT marks a print you would not keep, and asks why. The verdicts feed the tuning of the process.
COLOR AND SLIDE
The color lab is still in beta. When enabled, color film stocks appear in FILM and color paper boxes in PAPER.
Color film
- MEADOW 160 (SOFT C-41 COLOR): the portrait stock. Low contrast, wide latitude, skin before sky.
- CARNIVAL 400 (PUNCHY C-41 COLOR): the everyday 400. Punchy in the mids, soft roll-off at both ends, the famous latitude. Underexposed shadows print cool.
- VISTA 100 (VIVID, FINEST GRAIN): the landscape stock. Vivid, with the finest grain available. Underexposure creates cyan shadows.
- LANTERN 100 (E-6 SLIDE, NO MERCY): a slide. The steepest and least forgiving stock in the building. Hard knees clip both ends; the latitude is narrow.
The enlarger HEAD
The head switches between two modules. Cross-process printing requires this switch.
- B&W (condenser): the ordinary path. Grade is the contrast filter.
- COLOR (dichroic): a color head with CYAN, MAGENTA, and YELLOW filtration dials. Each dial runs from 0 to 170 filtration units (density times 100, the darkroom convention). Drag a dial window up or down to spin it, or nudge it a unit at a time on coarse pointers.
The dichroic head is dual-purpose.
- On color paper, the dials are your color balance. The head starts at a null pack; an empty head prints the reference stock clean. The chart reads how many stops the pack eats or opens. All three dials past the neutral floor is only neutral density: ALL THREE IS ONLY GRAY: COME DOWN TO TWO.
- On black and white paper, yellow and magenta become the contrast control. Grade is filtration now; grade steps seat the dials: YELLOW SOFTENS, MAGENTA HARDENS. The dials stay live through the exposure. A filtration move during the burst splits the sheet, as in real split-grade printing.
Color paper
- Postcard (RA-4 COLOR, NO SAFELIGHT): glossy trade color paper.
- Slide Print (DIRECT POSITIVE, DEEP GLOSS): the Ilfochrome idea. Its bake runs backwards: a slide prints straight and a negative prints inverted. It lays down the deepest gloss blacks.
For color paper, you'll see dye passes: CYAN PASS, MAGENTA PASS, and YELLOW PASS. The intensity of each pass can be adjusted on the dichroic head.
ANSEL, THE DARKROOM ELDER
Ansel sits in the bottom right of the darkroom. He is the printer who came with the building, ran it before you arrived, and made most of your mistakes first. He respects the work more than the result.
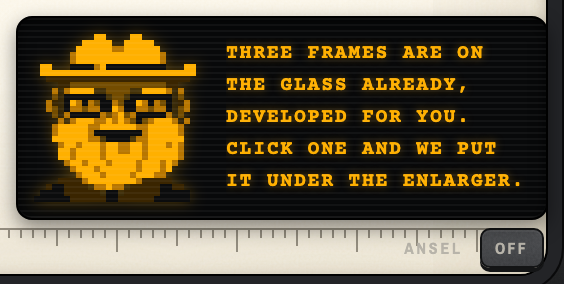
He speaks when you summon him and when you poke his face. He also speaks when your recipe or result warrants a word: a large temperature shift, a hard push, a blown exposure, a promising accident, or a print worth keeping.
He walks you through the core loop once on the first session in a new browser.
OFF dismisses him. CALL brings him back.
KEYBOARD AND GESTURE REFERENCE
| INPUT | WHAT IT DOES |
|---|---|
| Click or tap corners | Place a dodge or burn card's corners |
| Enter | Close the current cut |
| Escape | Abandon the current cut |
| Click the first corner | Also closes the cut |
| Hold HOLD TO AGITATE | Agitate the tank while you hold the key |
| Shake the device | Agitate, where motion input works |
| Drag a dial window | Spin a dichroic filter dial |
| Drag a negative | Rearrange it on the light table |
| Click a contact sheet | Lift the whole sheet to the light, and lay it down |
| Click a sheet's header | Write the roll's name, date, or file number |
| Drag to a dock | Carry a roll to the tank, a negative to the enlarger |
| Swipe the shelf window | Step through films, papers, or grades |
Backtick (`) |
Toggle the hidden tuning panel (power users) |